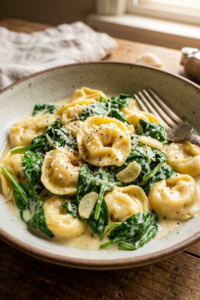
You know that feeling when you walk into a diner on a cold day and the smell of savory gravy hits you? That is exactly what this slow cooker beef manhattan brings to your own kitchen! Did you know this famous “Manhattan” dish actually originated in Indiana, not New York? Crazy, right! I remember the first time I tried to make this for my family; I was terrified the meat would be tough, but the slow cooker works absolute magic. Let’s dive into this hearty, open-faced masterpiece that feels like a hug on a plate.
 1")
Choosing the Perfect Cut for Roast Beef
Honestly, I used to dread the meat aisle. Standing there staring at ten different lumps of red meat wrapped in plastic was totally overwhelming. I remember the first time I tried to make a pot roast for a dinner party. I grabbed a generic “bottom round” because it was on sale and looked lean. I thought I was being healthy. Turns out, I was just setting myself up for disaster. The meat came out tough as a boot, and no amount of gravy could save it. I was so embarrassed. But hey, we live and we learn, right?
Through a lot of trial and error (and some very chewy dinners), I’ve learned that the cut of beef you choose is actually the most critical part of this whole operation. You can’t just throw any old slab of meat in the crockpot and expect magic.
Why Chuck Roast is the Real MVP
If you want that melt-in-your-mouth texture for your slow cooker beef manhattan, you have to go with a chuck roast. Seriously, don’t even look at the other cuts. Chuck roast comes from the shoulder area of the cow, which means it does a lot of work. It is loaded with connective tissue and fat.
Now, I know what you’re thinking. “But isn’t fat bad?” In this case, absolutely not. That white marbling running through the meat is going to break down over the long cooking time. It melts into the meat, keeping it moist and giving it that rich flavor we are after.
When I used that lean bottom round years ago, it didn’t have enough fat to self-baste. It just dried out. Chuck roast, on the other hand, falls apart beautifully. It shreds with just a fork, which is exactly what you need for this open-faced sandwich.
The Lean Meat Trap
I get asked a lot if you can use leaner cuts like a rump roast or sirloin tip. Technically, yes, you can. But I wouldn’t recommend it unless you really have to. These cuts are great for slicing, but they struggle to get that “shreddable” quality we want here.
If you are dead set on using a leaner roast, you have to baby it a bit more. You’ll need to add extra liquid or fat—like a stick of butter—to compensate. Even then, the texture is often a bit stringy. Save yourself the headache and stick with the chuck.
Prepping Your Meat for Maximum Flavor
Okay, here is where I admit to being lazy sometimes. There are days when I just dump the raw meat straight into the slow cooker, turn it on, and walk away. And it turns out fine. But if you want it to be amazing, you gotta sear it first.
Take five minutes to brown the meat in a hot skillet with some oil. You want a dark, crusty brown on all sides. This creates deep, savory flavors that you just can’t get from boiling alone. Plus, it locks in some of those juices.
I used to think searing was a waste of dishes. Then I did a side-by-side taste test with my family. The seared version won by a landslide. The gravy was darker and richer. Now, I try to make time for it whenever I can. Just don’t stress if you are in a rush and skip it; dinner will still be edible!
Talking to Your Butcher
Don’t be afraid to ask the person behind the meat counter for help. I used to be intimidated, but they are usually super helpful. Ask them to pick out a chuck roast with “good marbling.” They can spot the best ones way faster than we can. Sometimes, the meat is packaged so you can’t see the bottom, and you get home to find a huge gristle cap. A butcher can help you avoid that.
 2")
The Secret to Rich, Savory Brown Gravy
I have a confession to make. For the first ten years of my adult life, I thought gravy came exclusively from a little paper packet. You know the ones—just add water, whisk, and pray the lumps dissolve. I was terrified of making it from scratch. It seemed like this mysterious art form that only grandmas had mastered.
One time, I tried to wing it for a holiday dinner. I dumped a cup of flour straight into my boiling roast juices. Big mistake. It turned into a gluey, lumpy mess that tasted like raw dough. I actually strained it through a colander before serving it, hoping nobody would notice. Spoiler alert: they noticed.
But here is the truth I’ve learned since then: making killer brown gravy for your slow cooker beef manhattan is actually easier than the packet stuff once you know the rules. And the payoff? It’s huge.
Liquid Gold: Don’t Toss the Drippings
The most important ingredient is already sitting in the bottom of your crockpot. Those juices left behind after cooking the beef are pure liquid gold. They are packed with flavor from the meat, the onions, and the seasonings you used.
Please, I am begging you, do not throw them away.
Strain those juices into a saucepan. If you don’t have enough liquid (you usually want about 2 cups), just add some beef broth to make up the difference. I usually keep a jar of that “Better Than Bouillon” paste in the fridge for exactly this moment. It adds a punch of salt and depth that water just can’t compete with.
The Thickening Dilemma: Cornstarch vs. Flour
This is where people get into fights. Some folks swear by a flour roux (cooking butter and flour together first), but honestly? When I just want to get dinner on the table, I use a cornstarch slurry. It is faster, it makes the gravy glossy, and it is gluten-free if that matters to you.
Here is the trick so you don’t repeat my “gluey mess” disaster: never add the powder directly to the hot liquid.
Mix about 2 tablespoons of cornstarch with 2 tablespoons of cold water in a small cup. Stir it with a fork until it is smooth like milk. Then, whisk that mixture into your boiling beef juices. It will thicken up almost instantly. If it’s too thin, add a little more. If it’s too thick, splash in some water. It’s pretty forgiving.
Waking Up the Flavors
Sometimes, even with the beef drippings, the gravy can taste a little… flat. It happens. My favorite cheat code is a splash of Worcestershire sauce. It adds that savory “umami” thing everyone talks about.
If it still tastes “heavy,” try adding a tiny splash of vinegar or lemon juice. I know it sounds weird, but acid cuts through the fat and wakes the whole thing up. I learned that from a cooking show at 2 a.m. and it changed my life.
Also, taste it before you serve it! I’ve definitely put a gravy boat on the table that was way too salty because I forgot the broth I used was already salted. If that happens, peel a raw potato and let it simmer in the gravy for 10 minutes. It soaks up some of the salt. Just remember to take the potato out before you pour it over your slow cooker beef manhattan.
 3")
Mashed Potatoes: The Essential Foundation
Let’s be real for a second. You can have the most tender beef in the world, but if your mashed potatoes taste like cardboard, the whole meal is ruined. I learned this the hard way at my first Thanksgiving hosting gig. I bought a bag of cheap potatoes, boiled them until they disintegrated, and then—here is the crime—I put them in a food processor.
It was a disaster. I essentially made wallpaper paste. My uncle tried to be nice, but I saw him struggling to swallow it. It was humiliating. But that failure sent me on a quest to perfect my mash game.
Picking the Right Spud
The biggest lesson I learned is that not all potatoes are created equal. For a hearty dish like slow cooker beef manhattan, you need a potato that absorbs that rich gravy.
I used to be a die-hard Russet fan because they are cheap and fluffy. And they work fine. But lately? I am all about Yukon Gold potatoes. They have this naturally buttery flavor and creamy texture that Russets just don’t have. Plus, the skin is so thin you don’t even have to peel them if you’re feeling lazy (which I often am). If you want the fluffiest texture, stick to Russets. But for creaminess? Gold is the way to go.
Step Away from the Blender
Please, listen to me on this one. Do not use a blender or a food processor. Potatoes are full of starch. When you beat them too fast with high-powered blades, you release all that starch at once. That is how you get the “gluey” texture.
I actually went out and bought a potato ricer a few years ago. It looks like a giant garlic press. It was a total game-changer. It pushes the cooked potato through little holes, making them fluffy without overworking them. If you don’t have one, a good old-fashioned hand masher is perfectly fine. Just don’t overdo it. A few lumps just prove it’s homemade, right?
The Butter and Cream Ratio
Here is where I stop counting calories. If you want diner-style potatoes, you need fat. I used to use skim milk, and it was just… sad. It made the potatoes watery and gray.
Now, I use a stick of butter for every 3-4 pounds of potatoes. Yes, a whole stick. And instead of cold milk, I warm up some half-and-half or heavy cream in the microwave first. Adding cold liquid to hot potatoes seizes them up. Warm cream blends in instantly.
Don’t forget the salt, either. Potatoes need way more salt than you think. Taste them, add more, and taste them again. Bland potatoes are a tragedy I don’t want you to experience.
 4")
Assembling Your Open-Faced Sandwich
You might think putting a sandwich together is a no-brainer. I mean, it is just bread and meat, right? That is what I thought the first time I made this for my husband. I grabbed some thin, generic white sandwich bread from the pantry, slapped a scoop of wet beef on it, and handed it over.
Within thirty seconds, the bread had completely dissolved. It was basically beef soup with soggy dough floating in it. He ate it because he loves me, but I could tell he was struggling with the texture. It was gross. I learned that day that structural integrity is everything when it comes to a slow cooker beef manhattan.
The Bread: Texas Toast or Bust
If there is one hill I am willing to die on, it is this: you cannot use standard sandwich bread for this dish. It is too wimpy. It can’t handle the weight of the roast and the moisture from the gravy.
You need something sturdy. I almost exclusively use Texas Toast now. It is thick, it is fluffy, and it holds its ground. If I can’t find that, I will grab a loaf of unsliced Italian bread from the bakery and cut it myself into one-inch slabs.
There is a huge debate in the diner world about whether to toast the bread or not. Purists will tell you that a true Manhattan uses fresh, soft bread. I disagree. I lightly toast mine. Just a little bit. It creates a barrier so the gravy doesn’t soak through immediately, giving you a few extra minutes of texture before it inevitably softens up.
The “V” Cut Technique
Okay, this might sound silly, but presentation matters! When you get this at a diner, it just looks better than when you make it at home, right? The secret is usually the cut.
I used to just slap the bread down whole. It looked like a brick. Then I watched a short order cook prep one. He sliced the bread diagonally into two triangles and arranged them with the points touching in the center of the plate. It creates this nice diamond shape.
Place your scoop of mashed potatoes right in the center, between the two slices of bread (or sometimes right on top of the bread if you are feeling wild). Then, pile that shredded beef high. This setup ensures that every single bite gets a little bit of bread, beef, and potato. It is strategic eating.
The Gravy Tsunami
Here is the part where you need to let go of control. Do not drizzle the gravy. This is not a fancy French dish where you put three dots of sauce on the side. You need to smother it.
I take a ladle and pour the hot gravy over everything—the meat, the potatoes, and yes, the bread. You want it to cascade down the sides of the potato mountain.
One mistake I made early on was letting the gravy cool down too much while I was slicing the bread. Cold gravy on hot meat is a crime. It creates a weird, gelatinous film. Keep that gravy on the lowest burner until the very last second.
When you sit down to eat, the bread should be starting to soften, soaking up that salty, savory goodness. It is messy, it is not pretty after the first bite, but man, it is the ultimate comfort food experience.
 5")
Storing and Reheating Leftovers
I am a huge fan of cooking once and eating twice. Seriously, who has the energy to cook a full meal every single night? Not me. But with slow cooker beef manhattan, you have to be careful. I made a rookie mistake the first time I had leftovers.
I was cleaning up the kitchen in a hurry, and I just scraped the half-eaten sandwiches—bread, potatoes, meat, and all—into a single plastic container. I tossed it in the fridge thinking I had lunch sorted for the next day.
When I opened that container at work, it was a horror show. The bread had disintegrated into a brown mush that mixed with the potatoes. It looked terrible, and the texture was even worse. I ended up ordering takeout. I learned that leftover roast beef needs a little respect if you want it to taste good the second time around.
Keep ‘Em Separated
If you want to enjoy this meal later, you have to separate the components. I know it creates more dishes, and I hate dishes, but it is necessary.
Store the beef and gravy in one airtight container. Put the mashed potatoes in a separate bowl. And for the love of all that is holy, do not store the bread in the fridge. Just toast a fresh slice when you are ready to eat.
By keeping the wet stuff away from the dry stuff, you keep the integrity of the meal. The meat and gravy will usually stay good in the fridge for about 3 to 4 days. If you made a huge batch, this is one of those freezer friendly meals that saves the day later. Just freeze the meat and gravy in a freezer bag; it holds up great for a couple of months.
The Reheating Game
Now, when it comes to reheating, the microwave is convenient, but it can be dangerous. Have you ever microwaved beef and had it come out rubbery? Yeah, me too.
If you have the time, dump the meat and gravy into a small saucepan on the stove. Turn the heat to low and add a splash of water or beef broth. The gravy tends to turn into jelly when it gets cold, so that little bit of liquid helps loosen it back up to that perfect consistency.
If you must use the microwave (we have all been there), cover the bowl with a damp paper towel. It helps steam the meat so it doesn’t dry out. Heat it in short bursts—like 30 seconds at a time—and stir in between. Once everything is hot, then you build your sandwich on fresh toast. It tastes almost as good as day one.
 6")
This slow cooker beef manhattan really is the ultimate comfort food. It reminds me of those days when life was a little slower and dinner was the main event of the evening. It is rich, it is messy, and it feels like a warm hug on a cold day.
I hope you give this recipe a shot. Don’t worry if your gravy isn’t perfectly smooth or your potatoes have a few lumps—that just means it was made with love. If you try it and love it, I would be so happy if you shared a picture on Pinterest so I can see your creation!